


The Golden Rule of PWC Care: How to Flush a Yamaha WaveRunner Jetski (Without Ruining Your Engine)
Whether you are pushing your WaveRunner to its limits in the heavy deep-sea surf or cruising the calmer waters of a local dam, regular engine flushing is the single most important maintenance task you can perform.
For personal watercraft (PWC) owners, searching for the “correct way to flush a WaveRunner Jetski after saltwater use” is incredibly common—and for good reason. Doing this procedure out of order can introduce water directly into your combustion chambers, leading to a hydro-locked engine and thousands of rands in preventable workshop bills.
This definitive guide breaks down the exact Yamaha WaveRunner flushing procedure, the science behind the sequence, and the expert tips that keep your jet pump and cooling lines clear of salt, sand, and silt.
The Golden Sequence: Engine On First, Engine Off Last
If you remember only one thing from this article, let it be this rule. When flushing a PWC, Waverunner, Jetski on a garden hose, the water pressure from your tap is stronger than the atmospheric pressure inside a dead engine.
The Risk: If you turn the hose on while the engine is off, water will immediately backfill through the cooling jackets, overflow into the exhaust manifold, and pour straight through the open exhaust valves into the cylinders.
To prevent this catastrophic backflow, you must always rely on the exhaust pressure of a running engine to push the water out the back of the hull.
The Exact Step-by-Step Procedure. Note this is for Sout African & Mozambique based Jetskis where there is no risk of freezing!
1. Connect your Hose Pipe (Water OFF): Prerequisite. You can use a valve or alternatively start the engine then connect the water. This will potentially stop a gardener a child or some senile old person like me accidently turning the water on before the engine is running.
Locate your WaveRunner hose attachment port. On modern FX and VX models, this is a convenient quick-connect port near the stern deck or inside the rear door secured by two latches. On older setups, it may be an internal adapter under the seat. You will need one of these adapters Female Yamaha Flusher or the male version Male Flusher Securely attach your garden hose or Yamaha WaveRunner flush kit adapter, but do not turn the water on yet.
2.Start the Engine: Step 1. Start the motor. Ensure the Jetski is idling smoothly on its own before you touch the tap.
3.Turn the Water ON: Step 2. Immediately turn on the hose tap to full flow. Make sure you have good water pressure. In Mozambique and SA water problems the pressure can be too low at times. Within a few seconds check that water is sputtering out of the “tell-tale” visibility spout on the left port side of the hull to confirm proper water flow. Dont worry about the right starboard side its very rare water flows out of there especially on salt water models. Please note even if your Jetski has water flowing out of the water outlets you may still have a blockage. Have a look in our Technical Articles Section as I will be writing a detailed explanation why this happens.
4.Run the Flush Cycle: Step Run the engine for 1.5 to 2 Minutes.
Let the engine idle on the hose for 1 to 2 minutes maximum. This is the sweet spot for dissolving salt crust and clearing debris. Do not leave it running endlessly; your engine and exhaust will overheat.
5.Turn the Water OFF: Step 4. Turn off the garden hose tap completely or better still disconnect it from the Waverunner Jetski. Now switch the engine off.
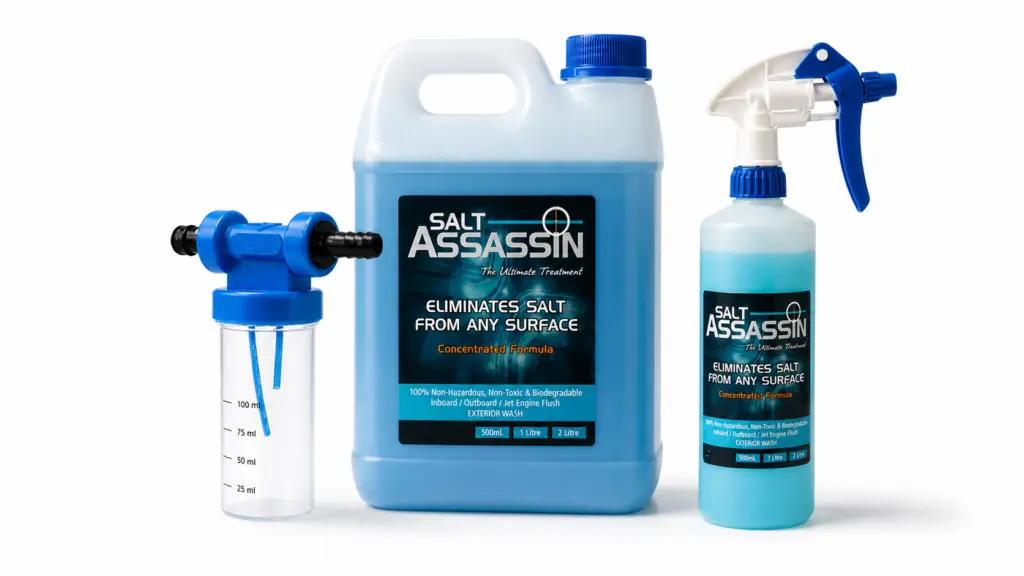
6.Time to do the important part! Step 5. Add Salt Assassin, to your Salt Flush Dispenser and connect it inline on your Hose Pipe Water Supply and then connect it to your
Waverunner Jetski Flush Connector.
7.Start the Engine: Step 6. Start the motor. Ensure the Jetski is idling smoothly on its own before you touch the tap.
7.Same process Turn the Water ON: Step 7. Turn on the garden hose tap with Salt Flush Adapter completely on and watch for the bubbles coming out of the Jet Pump. When you see the bubbles disconnect the Hose Pipe and turn off water supply. Now switch the engine off.
Yiu may have noticed that I missed the part that usually says blip the throttle to clear the exhaust. That’s intentionally and after years of experience building Jetski Engines trust me don’t do it. Leave the Salt Assassin in the system to do its job. Don’t flush it all over your driveway by blipping the throttle. Watch out for my technical article why this step is important but basically, we don’t have a freezing problem we have a valve and Anode corroding problem!
Do I Need to Flush After Freshwater Riding?
A common misconception among PWC operators is that flushing is strictly a saltwater protocol. While salt is undeniably the most corrosive element, freshwater environments present their own distinct hazards.
- Silt, Mud, and Algae: Shallow river launches and muddy dams and rivers, not to mention saline part salt rivers are packed with fine sediment and salt water. Your jet pump acts like a high-powered vacuum, sucking up mud and debris that settles into the tight cooling channels of the engine block.
- Sand Accumulation: Fine sand grains can quickly build up inside the thermostat housing or settle into the cylinder head cooling jackets. Over time, this creates internal insulating blankets, leading to localized hot spots and unexplained overheating codes on your dashboard.
Flushing with fresh water after every outing—regardless of where you ride—ensures that these abrasive materials are washed out before they can bake hard inside the cooling lines. By adding Salt Assassin through a Salt Flushing Adapter, you are preserving your engine and exhaust for years to come.
Elevating the Flush: Using Salt-Removal Additives
While a standard freshwater flush does an admirable job, plain tap water cannot always dissolve the stubborn, microscopic salt film that bonds to hot aluminum components under load.
For serious ocean riders, integrating a specialized marine surfactant like Salt Assassin into the routine is highly recommended. These chemical treatments break the surface tension of crystallized salt, neutralizing the film and leaving a thin, protective anti-corrosive coating inside the engine plumbing.
How to Use a Flush Mixer Semi Automatically
To use an additive effectively, place an in-line mixing dispenser between your garden hose and the Jetskis flush fitting. Use one of these adapters Yamaha Male Flush Adapter or a Yamaha Female Flush Adapter
Fill the Salt Flush Dispenser with the Salt Assassin or similar. During the first two minutes of your flush cycle, run the mixer on “clear water” to clear the bulk sand and debris. During the final 30 seconds, switch the valve to the “salt flush” setting to fill the cooling jackets with the treated solution. When you turn off the water and then kill the engine, the protective solution remains inside the water jacket rather than being rinsed clean.
Special Considerations for Supercharged (SVHO) Models
If you are pilot-operating a supercharged Yamaha model, such as the FX SVHO or GP1800R SVHO, your flushing protocol requires strict adherence.
Supercharged engines feature an aluminum intercooler element designed to drop intake air temperatures for maximum horsepower. Because the intercooler runs exceptionally hot and features incredibly thin cooling fins, it is highly susceptible to salt-air pitting and internal scale buildup. A neglected intercooler will quickly drop efficiency, and extreme corrosion can cause an internal water leak, allowing moisture to enter your supercharger system.
When flushing an SVHO machine, pay extra attention to confirming that a strong, consistent stream of water exits the cooling bypass lines to guarantee the intercooler core is getting a thorough wash. Also make sure you rinse the Engine, Intercooler and Throttle Body with Salt Assassin.
Pro-Active Workshop Diagnostic Checklist
If you notice any variations while performing your post-ride flush, use this quick reference table to spot potential cooling system issues before heading back out to the slipway.
| Symptom on the Hose | Potential Root Cause | Action Item |
| No water exiting the side tell-tale left port side. | Silt, insects, or a small stone is physically blocking the nozzle exit, or the thermostat is stuck closed. Alternatively, you have a blocked exhaust passageway or sand build up in the cylinder head or exhaust. Contact us to test. | Clear the external nozzle tip with a piece of monofilament fishing line or airline. If water still fails to flow, inspect the thermostat or for blockages. |
| No water exiting the starboard side tell-tale line. | No harm very few Jetskis if they have been in salt water will spray water from the starboard side | Don’t worry about it unless the port side shows low pressure or you have alarms or fault codes. |
| Water pooling rapidly in the bottom of the hull. | An internal cooling line hose clamp has vibrated loose or corroded, or an intercooler/exhaust gasket has breached. Also check the manual and Electric Bilge Pumps. | Shut down immediately. Inspect all internal water jacket hoses and spring clamps for secure sealing before running again. |
| Engine temperature warning light comes on while flushing. | Excessive scale buildup restricting flow, or water tap pressure is far too low to fill the water jackets. Sensors may need testing or test with Infrared Camera. | Verify adequate hose volume. If water input is sufficient, the cooling system may require a structural descale in the workshop. Water test to confirm pressure. |